


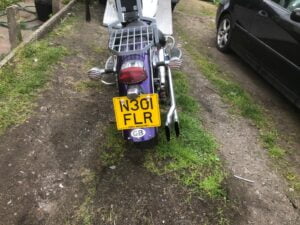
Honda VT1100 C2 Shadow ACE – 1996
Caroline has a Honda Shadow for best part of 18 years and at the time we started discussing some minor repairs, as a friend I offered my services for free to help fix up her beloved bike.
I only asked him to fix the electrics…
Caroline Edwards
Once we started talking about it we realised there was other work we could do to help sort it out, the fork seals where on the ropes – few electrical faults – pulls poorly compared to Pauls – brakes – clutch slip – backfires, etc. etc.


In the beginning
We discussed the nessersary fixes to get it running and working properly and then started adding in the possible fixes, repairs, upgrades and/or extras we could do too.
There was no pushing from any of us on this, it simply developed as we progressed from the fixes to possible frame repaint and if we are doing that what else can we do while its in bits and you know how that goes…
Our final plan was do all the fixes we can find along the way, replace and refurb what we can to keep the bikes character but just to enhance it along the way without going too far and spoiling it. It would be easy to bling it up and make it look like a plastic glitter ball on wheels and ruin the classic look or feel of Cal’s beloved bike – so there is a line to walk and we did it with style !
Breaking it down
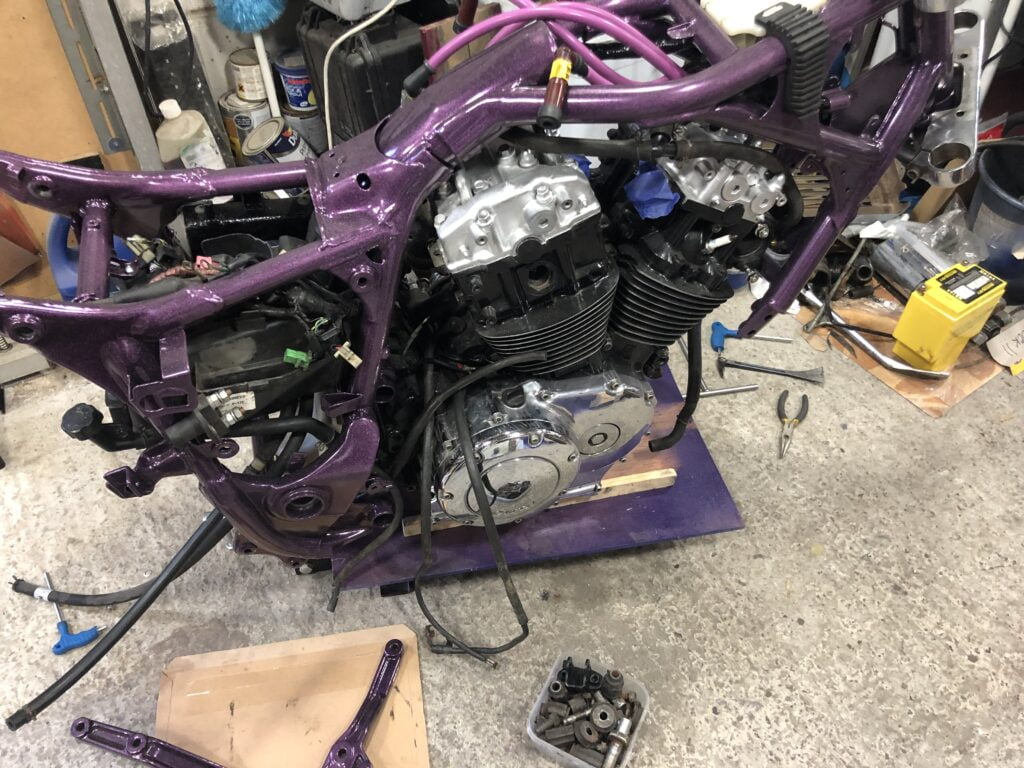
One fo the first things we agreed beyond the fixes was to podwercoat the frame and swingarm – the arm was a different colour from another bike along with a side panel so they needed sorting – powdercoating was chosen for its durability and as Cal wanted to keep her main OEM colours (and restore the missing blue pinstripe) we also chose a purple to compliment the main colours
- Frame and swingarm – Amathyst powdercoat
- Wheels and Rack – Ultra Chrome podwercoat
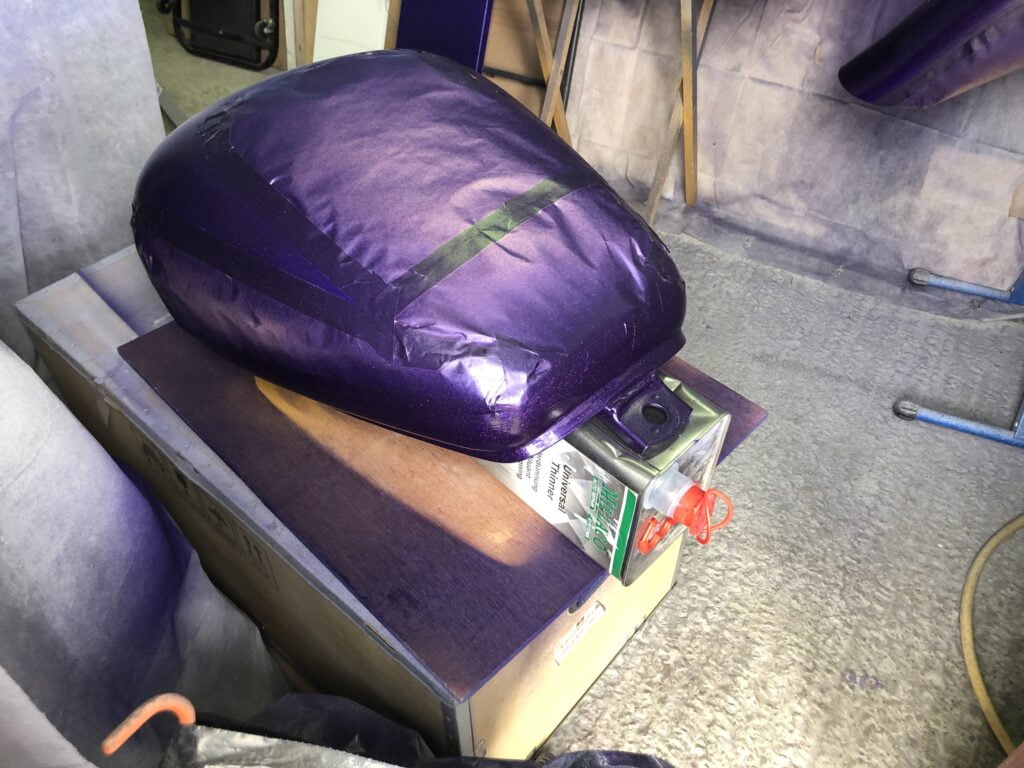
- Tank, side panels, front & rear fenders – repaint in Honda pearl (plus a trick bit of flake – show you later !)
Cal made a messenger group so we could chat as we went along to make descisions as we found any issues or options, I told her that I would treat it like my own and even the parts would be sourced from good sources not just factory/shop/main sources – if we could get the same part with the same quality from the internet for less money – we will. It makes a world of difference if you are trusted to do right by the bike and allowed to offer options when replacing parts and accessories – you can even brainstorm about the look and transformation, we had a blast !
The teardown was swift and relatively easy…


Once the bike was apart I had to strip all the old bearings (both wheels, headstock, swingarm), to keep the parts under control we decided to replace as it was due to be needed unless there was an offer on that we should not ignore – we could keep the costs down to what we need as we need and not clutter the place up with bits hanging around. I am pretty good at asset management and logistics so ordering at the right time and “hopefully” having stuff arrive at the moment it’s needed was another challenge that made the whole process roll along nicely… only 1 part nearly messed up our work but we will come to that much later 😉
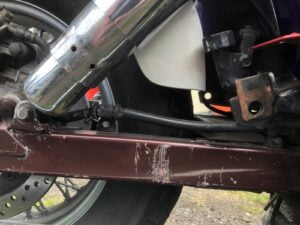
Paul came over to weld on two angle strips to the underside of the swingarm that would later be mounting points for an accessory (if the plans work !) and we needed it done before the arm was painted etc. We marked up, aligned, welded and done – nice one Paul !
We also took the opportunity to add 2 steel strips to the end of the frame to help support the rack/arms/fender as Cal’s Shadow was converted to a solo setup with a fibreglass fender there was no sub-frame or metal fender support, so we added the strips as hidden support.
The stripdown then moved on to the various parts as the frame, arm, rack and wheels went off for powdercoat. I built a list as everything was checked and inspected so Cal & Paul knew what was found, what we needed to do and what we could do – we couldnt stop buzzing as we went. The chrome parts where checked, some went off for re-chroming, some needed a damn good clean & polish and some needed a bit of creative thinking so we didn’t have to replace.
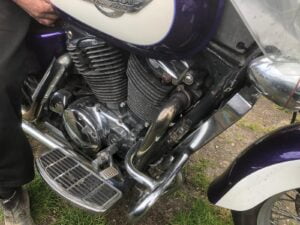
The engine was drained, flushed and filter dumped. The side popped and the clutch plates and “better” springs replaced and with a new gasket buttoned back up lightly as I had ordered a stainless allen-bolt kit. This was a good time to clean up, mask off the chrome, dress the engine with some fresh black enamel and sand the end of the fins. The stainless kit was much cheaper than expected as the supplier made it a template for a new C2 kit – on arrival I buttoned up the engine, replaced the rest of the main bolts, new magnetic drain plug, new filter, and for now I stopped and put it to one side till later.


brackets added with 3 lugs before grinding smooth and sent out for coating
Forks
Cal had already told me the atleast one of the fork seals was gone so I advised a full strip, service and rebuild to sort them out, she had mentioned it never felt right and I think I found out why as we went along.
On teardown I found the oil was unbalanced and one side had old (realy old and pretty bad) while the other had not so old oil, never a good thing to find but helps explain a bit of the problems Cal experienced, there was also a washer missing internally which was replaced.
I did a full stripdown, clean out, check and rebuild of the forks, new seals and dust caps, balanced fluid and basic checks to finish.
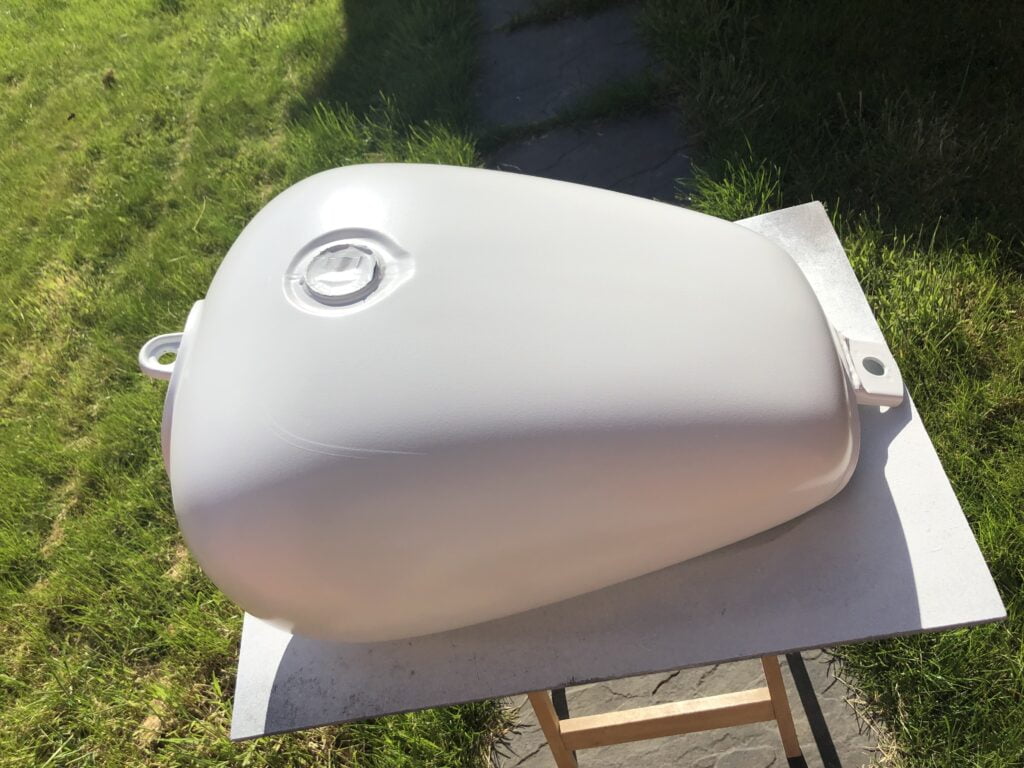
Paint
I then started to repair and prep the main paintwork, panels and fenders needed old holes filling. Some scratches and age related marks to be sorted, smoothed and made ready.
Once prepped I had a special idea about what I wanted to do and run it past Cal & Paul for approval, it took some explaining but they trusted me and let me run with the idea… I think they are happy with that descision 🙂
- Every layer was gently sanded or smoothed between the following layers until we get to after the carrier-coats
- Created a tracing paper template of the OEM Honda tank lines and guides for the fenders
- Sanded and wiped all – prepped and ready
- All – barrier ISO coat to stabilize from what ever was underneath
- All – White primer
- All – White 2k base – Honda OEM white pearl
(all done so there is no difference/shade when the purple is applied to areas or panels) - Mask off the purple areas – half way under what will be the blue pinstripe line (3mm)
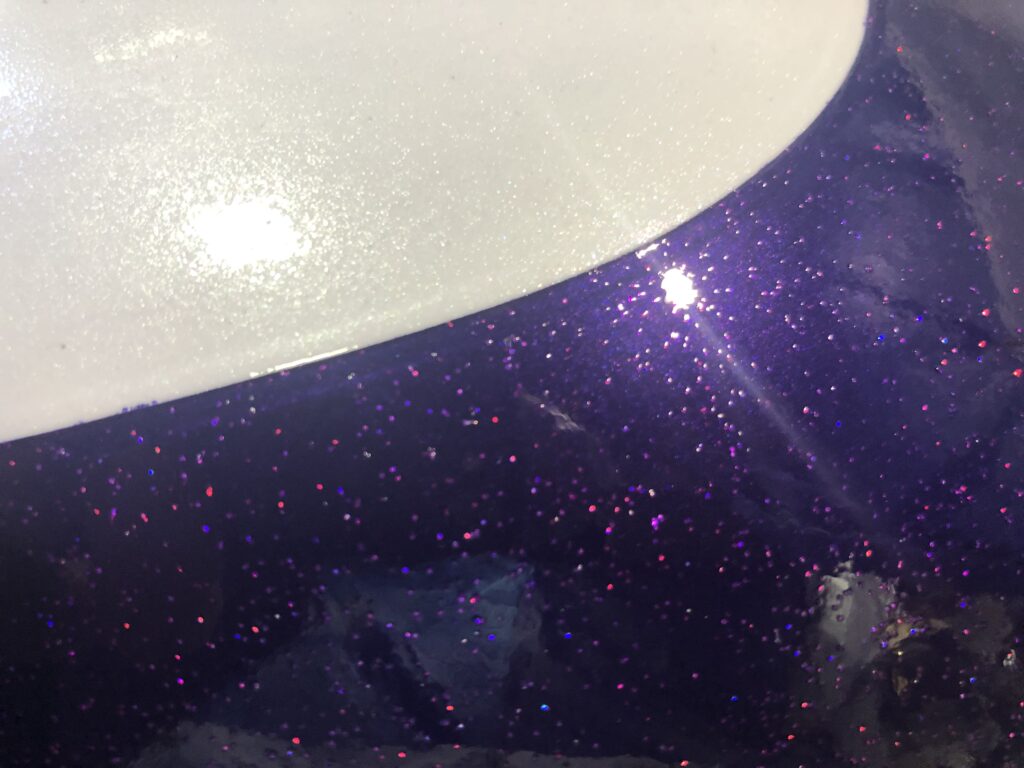
- Added the ultra-fine white holo-flake in a clear carrier coat over all the white areas
- Stripped all the masking and re-masked to cover all the white areas along the same pinstripe seams
- Areas and panels – Purple 2k base – Honda OEM purple pearl
- Added the micro-fine (different size) purple holo-flake in clear carrier coat over the purple areas and panels
- Stripped all the masking, cleaned up the area seams then started the 2k clear coats to level the flake layers
- Once I had enough clear over to be sure I couldn’t hit the flake I then smoothed and re-coated the 2k clear
- Added the blue pinstripes and a final layer or two of 2k clear to seal the deal
- I didn’t re-fit the tank side logos till much later so they got a thorough clean and new mounting tape
- And rest…. 10 days of painting to get this result but I truely think it was worth every second !
The pics dont really show the true depth and effect of the finished paintwork but all looks like OEM at distance and dull light, but if the sun hits or your closer then the purple is like a star field with pinks and blues hidden within and the white is like fresh snow full of tiny crystals thanks to the two types of holographic flake


Parts
We managed to snag some superb replacements for the usual suspects as we progressed, the rear shocks where working but a bit rusty/rough so a second-hand pair that I found online turned out to be excellent condition. little bits where replaced as we went and some where simply replaced/upgraded after discussion.
Front disk was beyond it’s limit but back was fine, new sintered HH pads all round to improve performance. Hel braided silver/clear coated brake lines to replace the aged black Honda lines. New LED front marker lights and added a little wide LED fog light – connected with a pair of purple rotating LED marker lights ;), new LED bulbs and after much discussion and searching high and low we found rather cool chrome bullet LED indicators. Plus I added amber side reflectors (with LEDs) as side running lights – not forgetting the “finger” eye level tail/stop light and skull LED number plate bolts. We also nabbed a stainless radiator grill with a skull pattern but I added some alloy black mesh behind it to stop stones getting to the Rad’ with the wider openings.
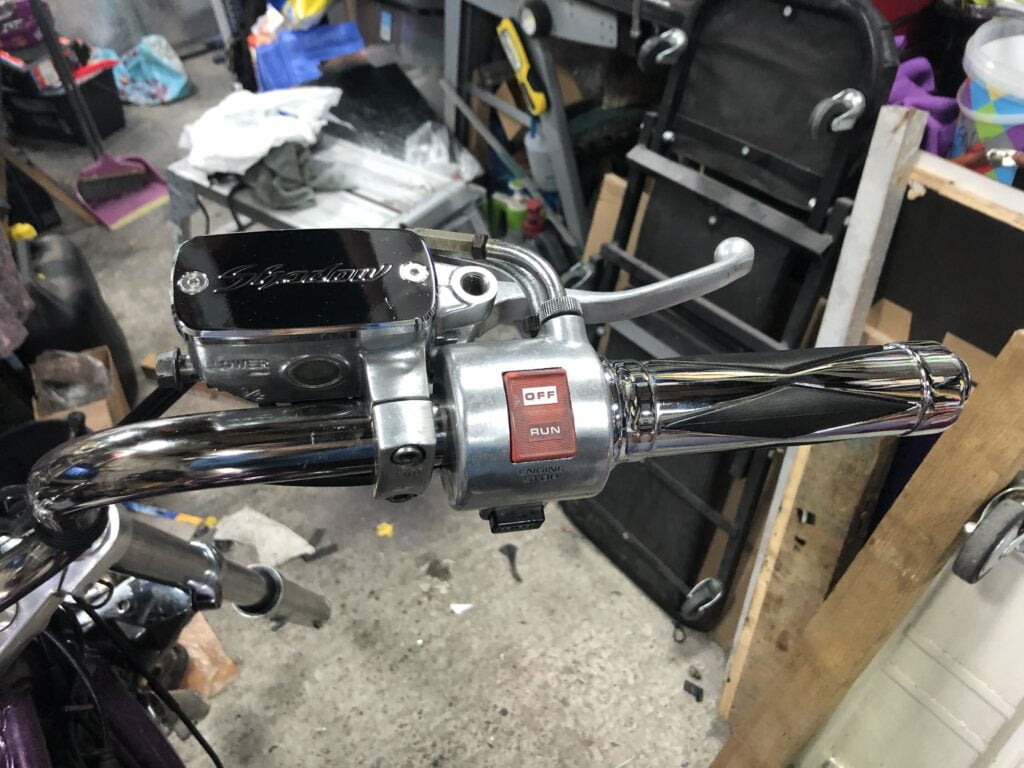
New bars, grips, levers, and one of my best deals “ever” was to get the seat & pad recovered – I won’t give the game away but it was a cracker deal and the quality… (purple/white and blue stitching) ! I even made an aluminium panel that I covered in purple vinyl to conceal the back of the pad, finger light cable and rack lugs 🙂
We also had to alter her straight thru fishtail pipes, they gave no back pressure so the pops and bangs where causing issues with the carbs and anyone following was just plain deaf, so Cal (eventually) allowed us to cut them – fit db killers with no wadding (still loud but not sooo loud) and gave a little back pressure to reduce the gunshot & scatter effect 😉
So many bits where replaced or upgraded but we stuck to the concept – must only be similar or a mild upgrade to keep the character, to be honest I think we nailed it !

HEL brake lines 
Radiatior grill, new over old 
Foxeye new front disc
The Rebuild
So much was serviced and prepped while apart the rebuild went surprisingly well, only one real sticking point due to a broken exhaust stud that “should” have been a simple extract and replace…. but we all know how that goes. Two days at least – trying every trick in the book including Paul coming over (better welder than me) to re-try welding a nut on so we can remove it and 2 breaks later its now down to the face and still in tight as feck! Even moved on to a drill and extractor with no joy what so ever. So eventually I noticed the face also had a spare space and if we turned the flange about 30 degrees and re-drilled/tapped… BINGO !
So much work went in to rebuilding it slowly and carefully, there was no rush or pressure to rush so it progressed really well. The carbs where cleaned and serviced (kits used too) along with just about every bike part that was de-greased/cleaned/reused and returned to the bike.

Red reflectors replaced with amber 
reflector & LED combo 😉 


stone proofing the larger gaps 
stainless grill and amber reflector/led 
Headlight and fog/purple marker switches lite up too ! 
Nice new levers 
adding “sneaky” glow lighting… shh ! 


The number plate skulls eyes light up with the brake 🙂 
front indicators are also running lights like original pair
Some of the choices Cal had to make where difficult at times but ultimately paid off big time !
Things like the white wall tyre’s – they took so long to source 15″ rear (no problem) matching front 18″ (good luck!) but eventually we did and where ordered….
The EXTRA !
One thing Cal and Paul had asked if it was possible was some form of reverse or assist as the Shadow is no light weight and only on some locations where the camber or incline is against you it runs the risk of slipping or falling, I was honest when I said I would look in to it and try to find a ready made module or try to design one but I had give an honest “I can’t guarantee anything” answer at that point.
When I did the tear down I had already established there was no good off the shelf solution for the Shadow so it was down to me if it was possible, I took some pics, measurements, and sat down to do some head scratching (for a little while)
I came up with the idea of using a starter with gearing to turn that good torque in to reasonable power and a mechanism that can reach the wheel tyre (after some abandoned drawings, scribbles and way too much coffee).
I also concluded that using the same starter as the bike it will then act as a spare “just in case” if ever needed.
So after a couple more drawings and modifications I ordered in a starter, with a bit of research I found a small trail motorbike gearbox set that would give me the reductions I needed (cheaply) and some aluminium.
I also ordered myself a mini lathe that I had been dying to get for a while and now seemed like the right time to treat myself and now I had a good excuse 😉
So my design turned in to metal and gears, the brackets & lugs I fitted to the swing-arm with Paul before powder coating, and on with a bit of engineering to make it happen with fingers crossed…


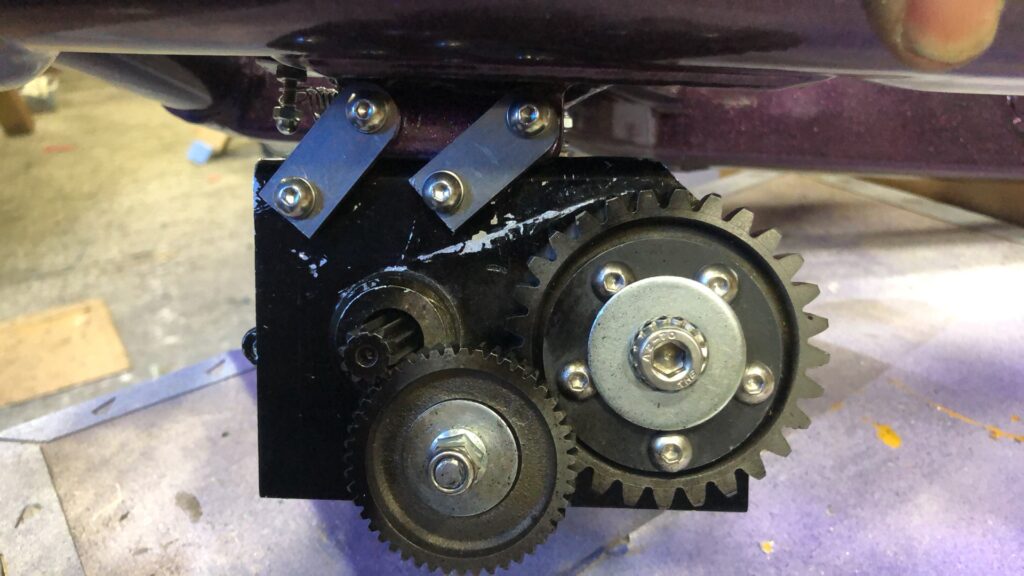


This was not the final version, changes had to be made but the essentials are…
With a simple left bar lever (so hands stay in control and over the front brake with your feet down to stabilize)
the control is pulled (so no accidental push operation) and activates the reverse so it moves out against the tyre and during the pull it activates the switch/solenoid under the seat on the mid-box cable link (with both side adjusters for coarse and fine adjustment) and assists at a slow steady pace to reverse !!!!
A tyre of woe and customs !
When Cal asked for white wall tyres I could understand the appeal – on her cruiser it would finish the look but finding them was like looking for Lord Lucan…
I eventually found the right tyres and sizes as a Dunlop pair (different models but a good match)
I ordered from National tyres but after a few days they cancelled the order stating there was no stock available in the country. I searched around and it was true in the UK no one seems to have them, so I searched further and a supplier with an Oxford base (no customs charges to add) agreed to source them from their European chain, cool !
Both tyres re-ordered at the same time and the front arrived promptly after a few days, a few days later I started to check as I needed the rear to setup and adjust the reverse so I could then do the exhausts etc. few things to finish everything off and this was a roadblock.
Chase the supplier – stuck in customs, checked with DPD and same reply, this went on and on for almost 3 weeks (gah!)
Eventually the rear tye arrived and I could finish the bike “just in time” for the road test the day before and handover to Cal on our way out to the Yorkshire Pudding rally we attended that weekend. Good grief it was frustrating and so very nearly messing up our plans !
Final surprise
Paul had mentioned that Cal had loved the LED glow lighting she had seen on another bike in the past so we secretly conspired to add them without her knowing until the reveal, we accepted the risk but if we got it right it would be the icing on the cake !
All the way thru the rebuild we agreed Cal would only see pictures of “bits” of the work or bike, so she would get an idea of how its going but no full-view until the big reveal and hand-over. Paul had to come over during the rebuild so he was aware but to say the reveal went well and Cal was surprised/shocked even emotional was BRILLIANT !!!
I was both happy and honored to help, I have enjoyed every minute of working on Cal’s Shadow and collaborating with Cal & Paul to make this a fabulous repair/rebuild/restore and so much more. We went off to the YP rally and to be honest I don’t think we stopped grinning all weekend !


